Posted on

Feeling Knotty!

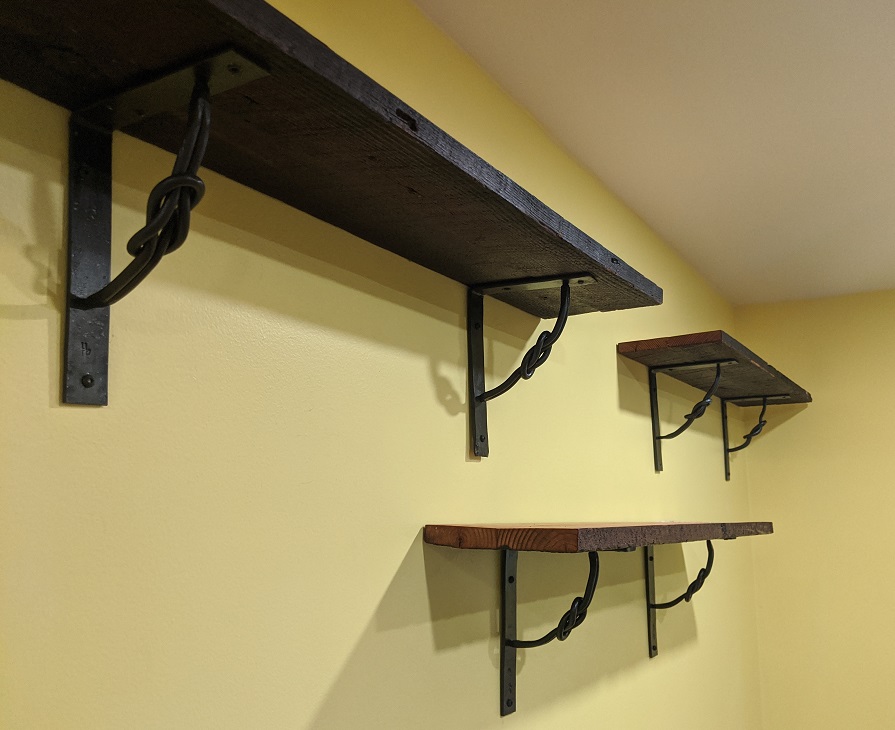
Shelves! Everyone needs shelves, right?

If I was taught anything by my parents there are three secrets to a happy life: good food, good booze and good friends to share them with! While recently there has been little opportunity for the sharing part of things, I found myself running out of space in the liquor cabinet. We had recently renovated our kitchen and I had a brand new blank wall to play with; why not build some shelves! I wanted something interesting other than traditional scrollwork and started playing around with some bar stock in the basement.

All in all, the knot part worked out well! The ‘getting the knot sorted out in the angle iron’ was a different story! Again, I apologize for not having pictures of the trial and error…one doesn’t think to take pictures when in the midst of things! Now, if I had an intern…but I digress!

The wood here is actually quite interesting in and of its self! We live in a house built in about 1903 and during the initial renovations my father in law was smart enough to salvage as much of the original timber as possible. This straight grained, clear pine is amazing stuff! Rough-sawed to 4″x 2″ it has been weathered in place for over 100 years and looks amazing. I asked him to prepare three boards for me and he provided these outstanding planks by ripping them in half (ish) to about 3/4″ and laminating them together. Couldn’t be happier!

Now, the angle-iron could have been worked better by me! Getting things square by eye is…interesting. I did not succeed exactly, but they were good enough for what I was doing. After all, in a house over 100 years old, nothing – and I mean nothing! – is square or plumb!

As you can see, I tried a few things out on the bars. Didn’t love the hammered texture, but in looking at it again if I had textured the entire bar I think it would have come out much better. All in all, I was pretty happy with how they turned out! I need to work on my forge welding (don’t tell anyone; I cheated again with the MIG gun…), but that is something that will come with time.

As always, keep making stuff folks!

-Russ

Posted on

The Cleaver Is Done!

Part 3 of the Cleaver Project

Well folks, it is done! The cleaver’s final heat treat and handling went perfectly!

Really nothing much to say about this process; it was a lot of sanding, checking of fit, sanding more then polishing. So. Much. Polishing.

To be honest, I really don’t love the look of the ‘forge finished’ blade. I love the look of shiny, mirror-polished metal!

That said, I think it all worked out really well! Shane (the customer) was so excited that when I called to tell him I was about an hour from delivering it, he went and bought a chicken just to try it out! Worked absolutely flawlessly. No nicks, no rolling, no splintering of bone when going right through any part of the carcass. Total success!

I think the highest compliment he gave me was the following day when he decided to try it out on cutting some prime rib steaks; told me that it performed as well as the Shun chef’s knife he has and that he know wants a complete set to match the look of the cleaver. Couldn’t be happier!

Thanks for reading all, and if you are looking for something like this, reach out and let me know!

Posted on

Weathervane: Complete!

Part 2 of the Weathervane – boy am I every happy with how it all turned out!

It is not often that I can say that I like I piece when I’m finished. Oh, its alright I’m sure and I can imagine that there are few that would be able to see the flaws…but I can see them. They stand out like neon stripes on a black background and it is all I can see!

This one though, for what ever reason, I could see past them and for the first time I can honestly say that I am proud of what I made. Is it perfect? Nope! For one, I am a terrible welder and there really wasn’t a practical way to attach these small elements without the use of my trusty metal glue-gun (solid core MIG welder). But, as the saying goes “A grinder and paint makes me the welder I aint!”.

Each of the arms was done free-hand. I had thought about making up a jig of some sort for the scrolls, but it would have taken longer to make it than to do up the four of them. I did however make the first and use it as a template for the others! I think that all in all they each came out similar enough to be coherent, but unique enough to know that it wasn’t machine made. Again, are they perfect? Nope! Somehow that is OK though!

The spinning bit took some time to figure out. I wanted to ensure that the arrow and unicorn would be able to be as free as possible for as long as possible, so I moved away from the traditional design of a hardened pivot point in a receiver of some sort and went for two of the tiniest sealed ball bearings I could find. Again…I need to take more pictures! Regardless, I machined in two races top and bottom on the vertical post and pressure fit them in place. Given there isn’t going to be any force on the part, I didn’t feel the need to mechanical fix them in place. On the base, I machined out a plug for the bottom and a bushing for the top of the vertical pipe. The bottom plug was drilled out to receive a mild steel rod the correct diameter to fit into the bearings (3/16″) and the bushing was there to add some rigidity to the system. Again, given that this wasn’t going to be seeing any meaningful load, I simply press fit the rod in place as this is the first thing that is going to get damaged by an errant soccer ball!

Finally, after assembling I decided to go with an outdoor matte rust paint rather than a traditional oil/beeswax finish. I wanted this to be as low-maintenance as possible while being able to withstand the elements. Ultimately, I think I may have made the wrong call. I couldn’t find a rattle-can in matte, so opted for brush application. It was such a thick paint that the brush strokes were fairly evident on the flat surfaces…not as awesome as I would have liked! Perhaps once the paint has worn off and the rust started in, I will take it back to the shop and give it the more traditional finish. Who knows?!

And here it is in all it’s glory!

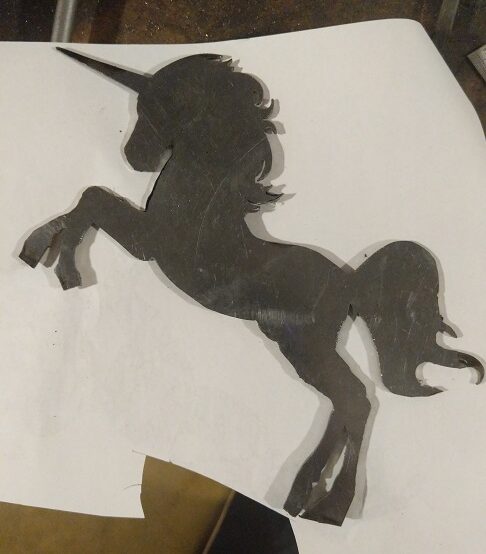
I love it!! It works perfectly with the playhouse and I think the proportions are right on. Will I make another one? Totally! Just let me know what you want it all to look like. Will I hand-cut an intricate little unicorn out of mild steel sheet? Hell. No.

Remember; just because you don’t know how to do something at the outset, it doesn’t mean you can’t sort it out!

Posted on

I made a weathervane!

One never knows if one can make a thing until one tries!
(Unicorn Weathervane Part -1)

I think I may have mentioned it before, but I LOVE making things! Especially things that I have never tried before. So when a very close friend of mine asked out of the blue whether I could make a weathervane similar to one she saw online, I jumped at the chance. Heck, any excuse to try something new right!

First things first when taking on any new commission; make sure you and the client have a clear understanding of both what the expectations are (timeline, costs, etc.) as well as what the thing is going to look like! For this project, there were some basic size requirements as it was going to be installed on the top of a child’s playhouse, so things like proportions and weight were a consideration. I had thought 1/4″ or 3/8″ stock was going to work, so I did up a couple of test twists both to get the right look and to see what the visual weight is going to be. After sharing these tests with the customer (boy, this really feels ‘sanitary’). After sharing these tests with the amazing and outstandingly awesome Jamie Hudson, she and I agreed that both of these sizes made for a really bulky looking piece. More tests, more conversation and we decided the 3/16″ bar was going to be the right call.

After getting the final go-ahead, it was on to the actual making of the bits and pieces!

Unfortunately, this is where the pace of the shop outweighs the picture-taking. I really need to sort out a better way to do work in progress shots…but that is for another time. Needless to say, there were a couple complexities with the final bar sizing; the most significant of which was the fact that flat 3/16 bar stock smaller than 1/2″ wide doesn’t exist! All the scroll’s stock needed to be flattened out from 3/16″ round stock. Not the biggest issue as mild steel moves like playdough when hot, but it was interesting to see how things would likely have had to be done ‘back in the day’ when things like the Metal Supermarkets didn’t exist!

Hand sawing metal sucks. A lot. Like, a whole lot!! In hindsight I really should have outsourced this to a fabricator with a plasma or waterjet CNC setup…but you live and learn!

Next up, assembly and finishing!